Hiw to Draw a Zombie Face on a Kid Easy
C. Desatoff is a cartoonist and writer who loves saving money any way he can because, well, mostly because he's a cartoonist and writer.
Is It Easy to Draw a Zombie?
C'mon, admit it! You know you love them zombies! I'm not a kid anymore, but I still love my zombies, and I love drawing them too! Follow along as I lay out for you a step-by-step process for drawing a cartoony, cute little zombie.
There are all kinds of variations you can do to tweak your drawing, but if you're pretty new to sketching and cartooning, then just try to follow along as closely as you can. You can always try out new things later on after you've got the basics down.
I've been drawing for the past 30 years, and there's one thing I've learned so well. Want to know what the number one rule of being a great artist is?
Here it is: Your first drawing will almost always be garbage.
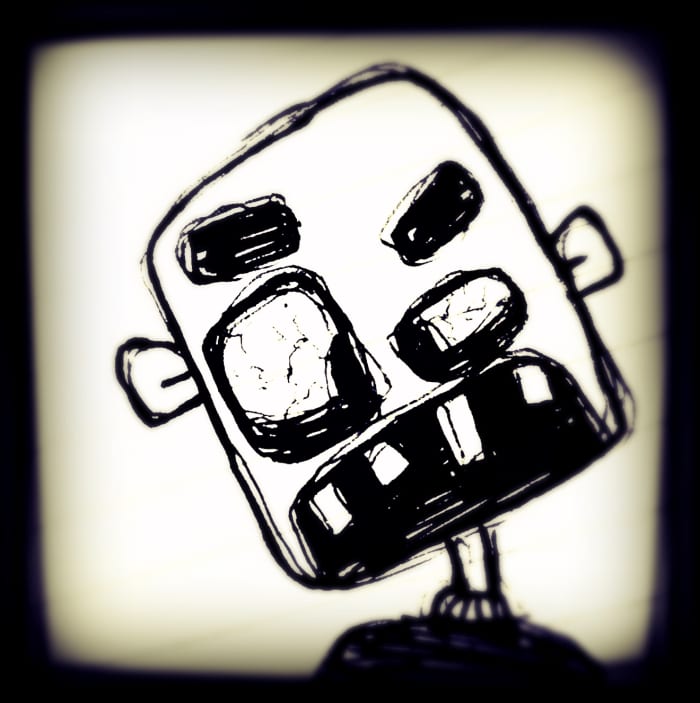
Do you think that the final image here is the first version I did of this little zombie? Nope. I've drawn him a dozen times and included two variations in this article (the first and the last image). Even professional artists are often unhappy with their first draft when attempting to draw something they've never drawn before.
Don't be hard on yourself if your first version isn't perfect. Even if it comes out pretty well, draw it again. Do the exact same drawing again. I promise you'll be impressed by how much better it looks the second time around.
So always redraw. Put this rule into practice, and you'll thank me later. The improvement in your drawing abilities will be amazing.
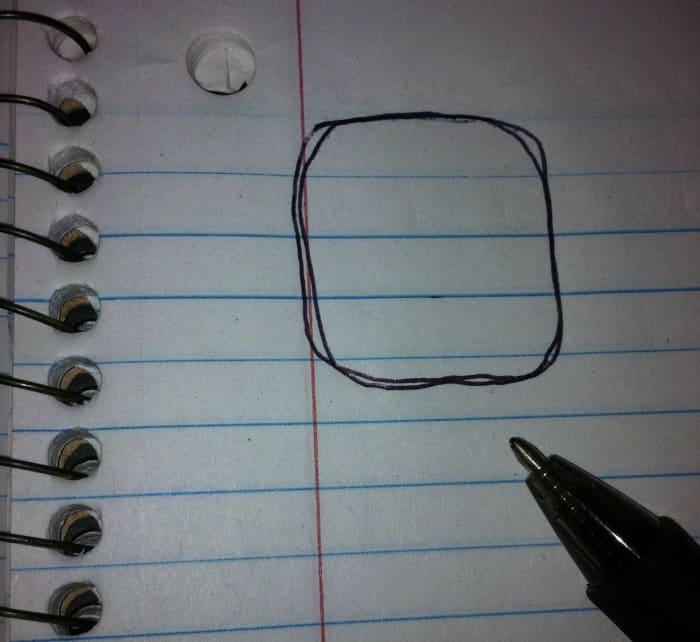
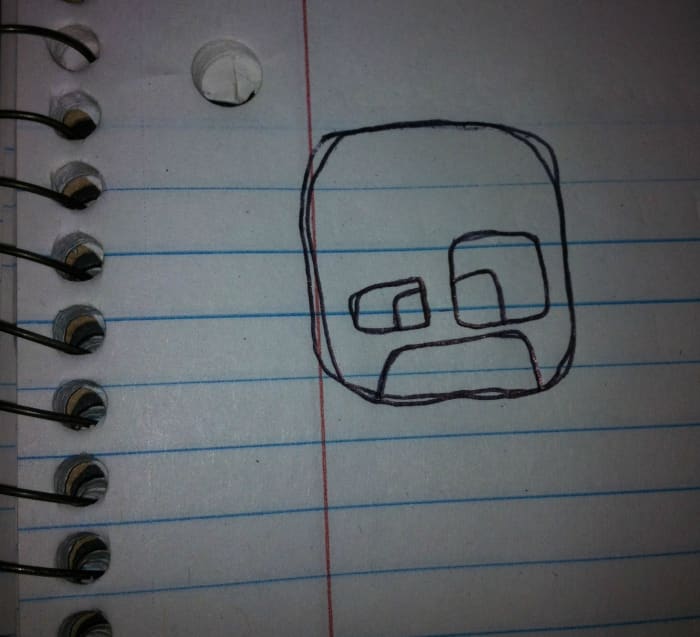
Step 1: Draw the Head
A basic square will do. I like to make my corners a little rounded. I'm using a ball-point pen here. I like ball-points because you can actually get a sketchy, pencil-like effect—less pressure makes for a lighter line, and more pressure makes the lines darker.
Later on, I'll go over the drawing with a Pilot G-2 to darken it up. Ballpoint doesn't reproduce very well, especially if you want to lighten the lines from the notebook paper.
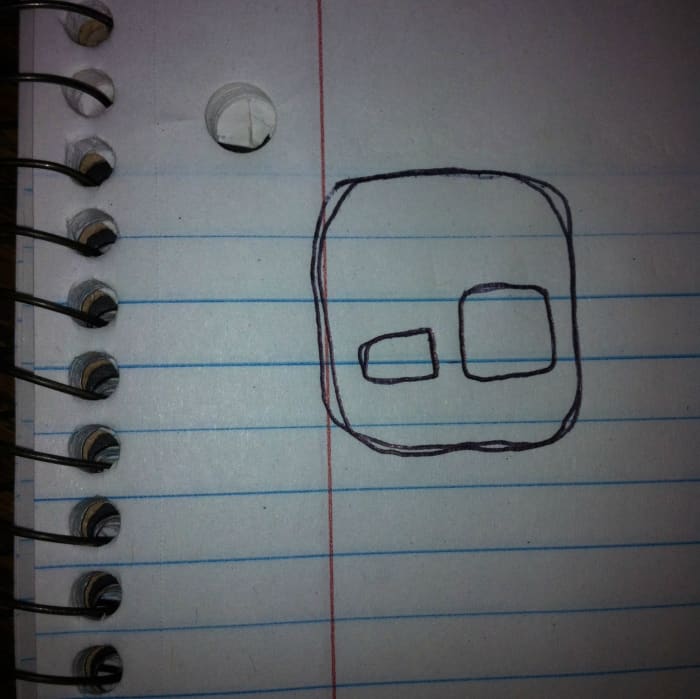
Step 2: Draw the Eyes
Just like with the head, I like to use basic square and rectangle shapes with rounded corners. I like to make one smaller than the other because I think it looks better.
You can experiment with how high or low you place the eye sockets. I like putting them a bit farther down, leaving a large forehead with plenty of room for the eyebrows.
Scroll to Continue
Read More From Feltmagnet
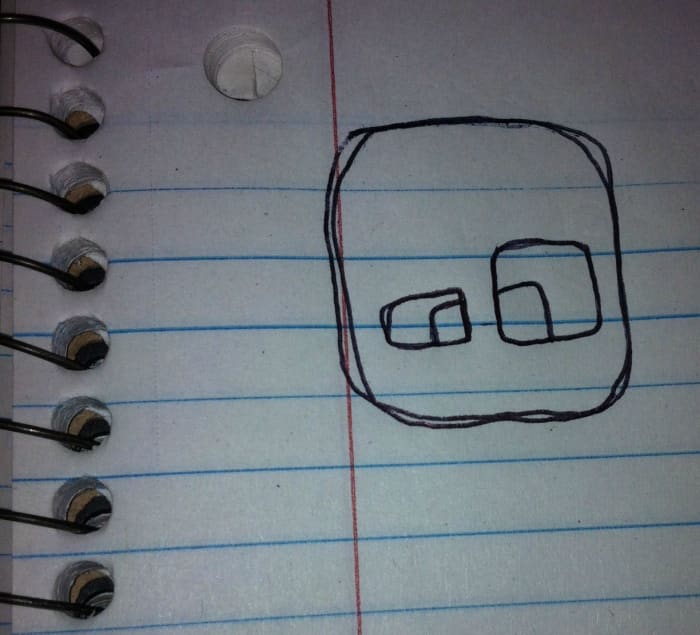
Step 3: Add the Pupils
Sometimes, I like to draw the pupils as if they were made up of a single shape inside the skull, and you're seeing this one shape through the two eye holes.
Does that make sense?
Notice how the top edge of the left pupil would connect to the other pupil, if not for that gap in between them. It's like there's a little square inside and you're seeing the two top corners of it through the eye sockets.
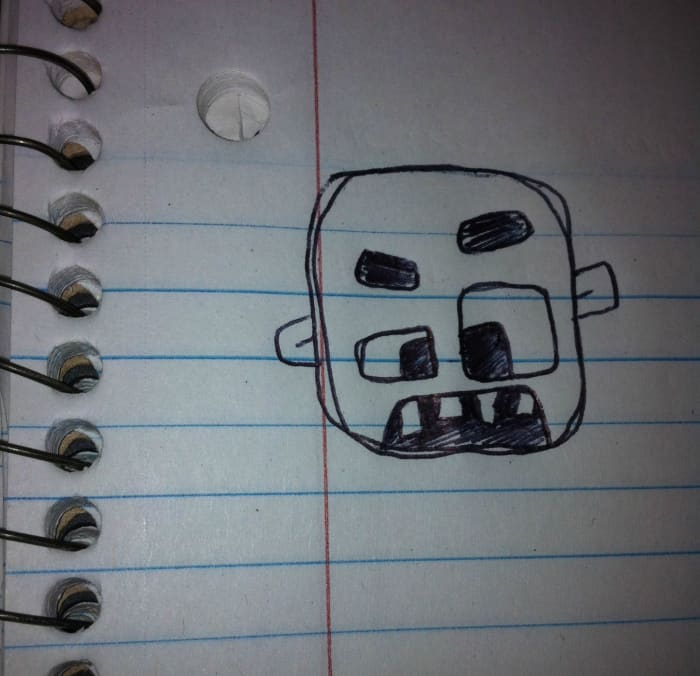
Step 4: Draw the Mouth
I normally leave a chin or whatever below the mouth, but I just put that mouth all the way down to the bottom. It's a different look for me, and I like it. It might not work with all characters, but with a zombie, it totally works.
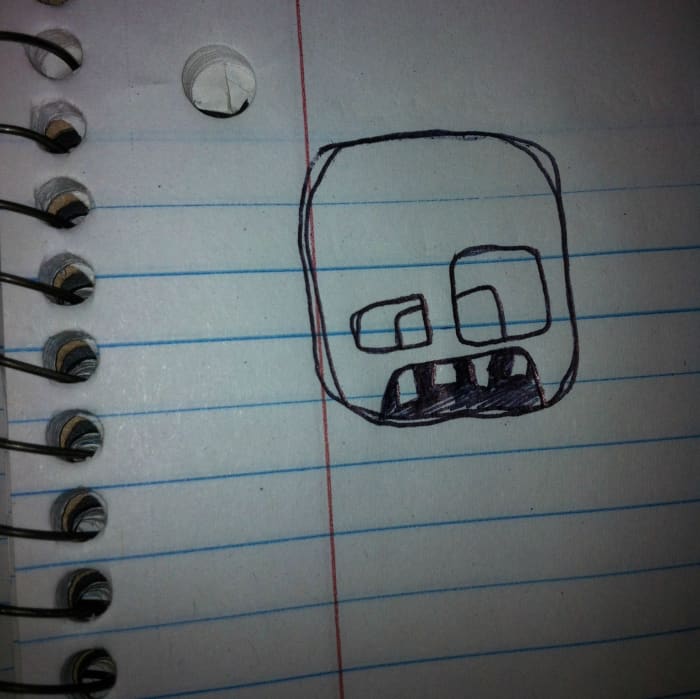
Step 5: Shade in the Mouth
Add in some crooked little teeth with gaps in between.
You can fill in the mouth completely black if you want, or even add little strings of saliva or chunks of the brain...up to you. I like the sketchiness of the lines; it adds a little depth. I may fill it in further when I come back later with the G2.
Just be careful not to go outside your lines too much (unless you're using a pencil).
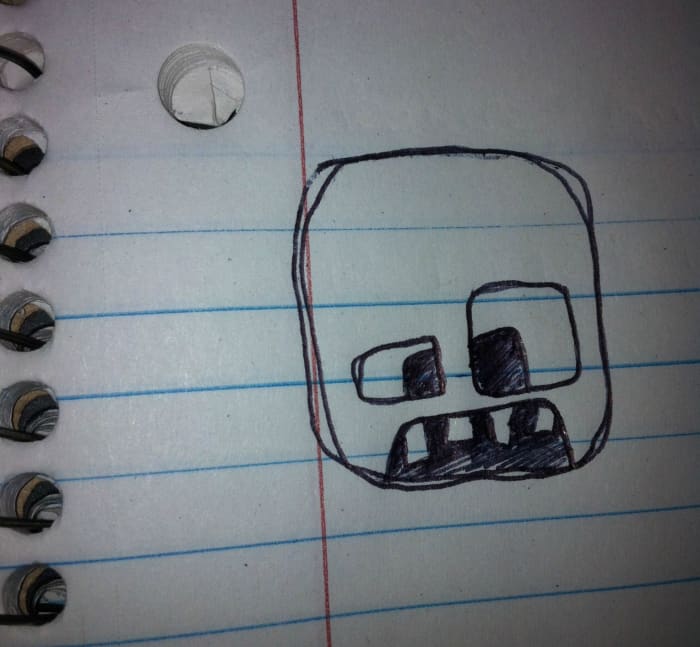
Step 6: Shade in the Pupils
Okay, so, uh...shade in the pupils then. As with the mouth, you can go solid black or do a more gradual shade to add depth.
Step 7: Draw the Ears
Call me consistent. I like squarish ears with rounded corners. They go well with the shape of the head, eye sockets, and pupils.
Feel free to experiment with other shapes and details.

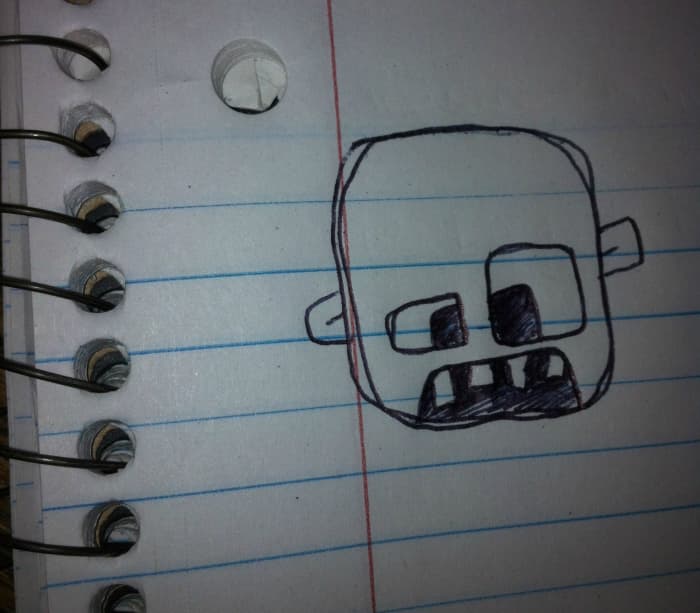
Step 8: I Almost Forgot...Eyebrows
You can have a little fun with the eyebrows as they add so much depth to your character. The eyes and eyebrows set the emotional tone of your drawing, so play around to find variations that work for you.
I've been working on my cartoon eyes and eyebrows for well over two decades, so believe me when I say that they are important. Experiment with the shapes, thickness, size, and placement.
Mine obviously are rectangles with rounded corners. Mr. Consistency, that's me.
Step 9: Shade in the Eyebrows
Again, just as with the mouth and eyes, you can go solid or sketchy. I went sketchy on these too, but as you'll see later on, the final image will depend on what you do in the digital editing phase.
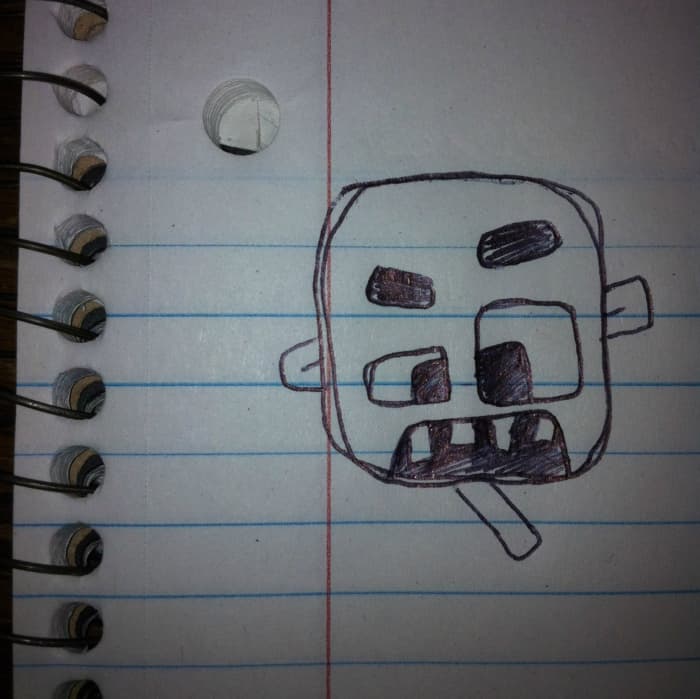
Step 10: Add the Neck
I'm going at an angle. He's a zombie, so you gotta make him look a little messed up, right?
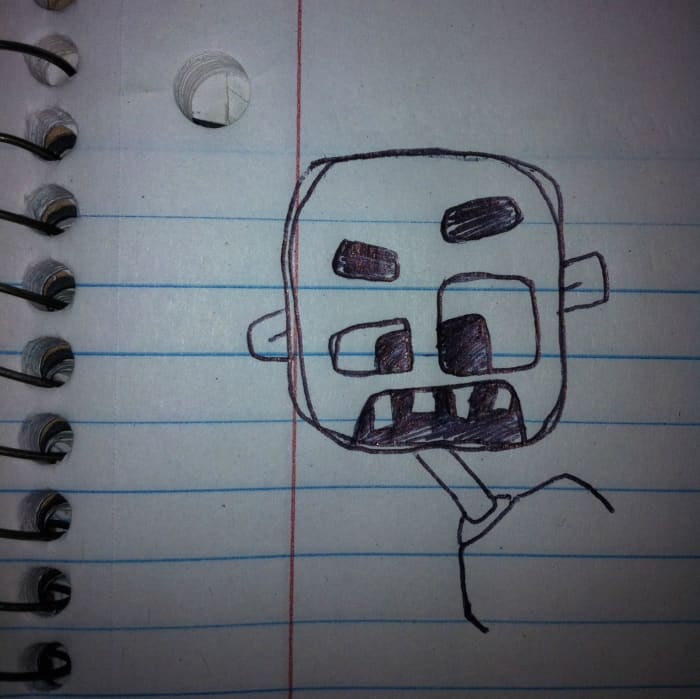
Step 11: Draw the Shoulders
This is as far as we're going on this guy, so there's no need to draw arms and all that. I want our little undead friend to look a little off-balance, so I staggered the level of the shoulders too.
You can get as fancy as you want with the clothing, but for a sketch like this, I'll often just do a little collar, and that's it.
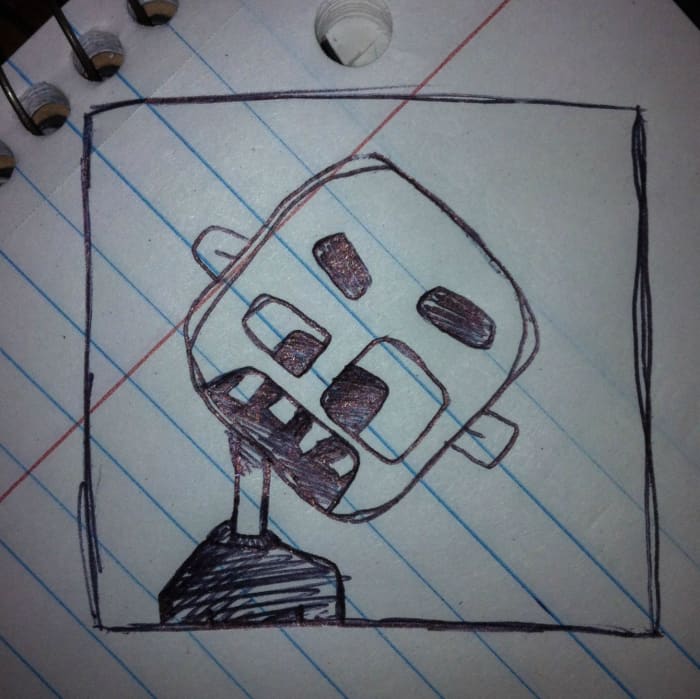
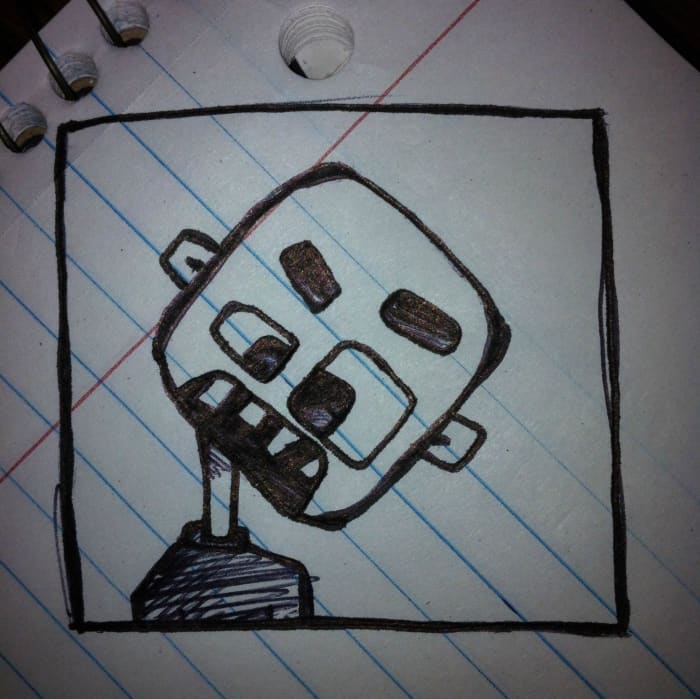
Step 12: Rotate and Frame
Okay, so now it all makes sense. Real zombies never stand perfectly straight with head and shoulders nice and level. No way. These guys are falling apart at the seams, so you want them to look like they're always about to fall over.
You don't actually need the frame, of course.
I just wanted to give you a little reference...
Step 13: Ink it!
We're not done yet! Okay, actually you might be done, but since I wanted to put the final image online, I knew that I was going to want to darken it up a bit.
If you drew this in pencil, then I highly recommend that you go over it in ink and erase the pencil lines. Just be sure to let the ink dry for a minute before erasing the pencil lines. Otherwise, you're going to smudge it and ruin it.
I love thick, heavy lines when I ink my stuff, so I took my G2 and went to town on it. Plus, the heavy lines reproduce well when you go to edit and put it online.
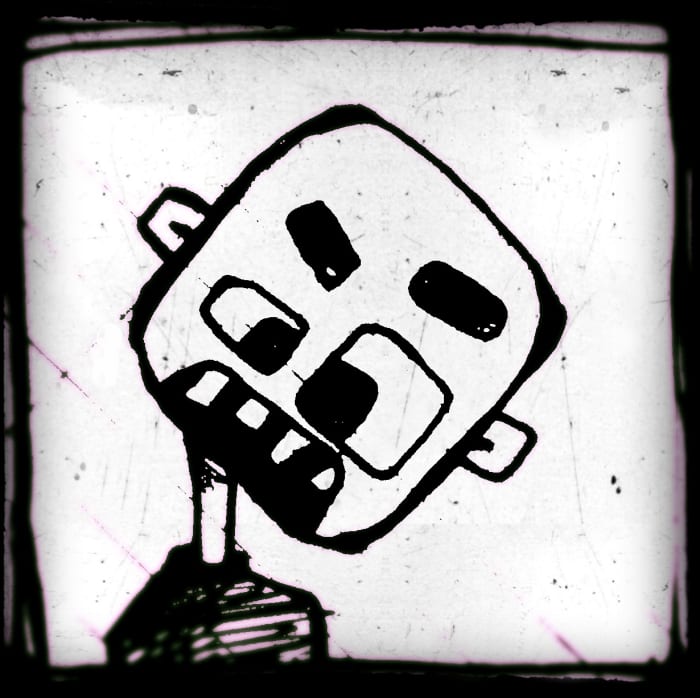
Step 14: Digital Editing
You can use Photoshop or Illustrator or some other program to edit if you want, but I've become so lazy in recent days. There are iPhone apps that can do an incredible job with just a few simple clicks.
I took a photo with my iPhone and used the free BeFunky app. Crop first. Then play with brightness and contrast to minimize the blue notebook paper lines, or just draw it on computer paper and skip some of the editing process.
I also used the Pinhole and TiltShift effects, saving each one as I go to layer them. The Pinhole effect does a great job of eliminating the background lines. Then I finished off with the Viewfinder 2 effect to get that gritty look.
Play around and have fun with it, and then post the final image up somewhere for your friends to enjoy!
So What Did You Think?
© 2012 Chris Desatoff
coffee lover on July 02, 2014:
WOW!!!SO.............. UGLY THAT'S SO EASY TO DRAW I DON'T KNOW WHY YOU WOULD POST AN EASY DRAWING
Chris Desatoff (author) from USA on December 05, 2012:
Hey Michelle! Thanks for passing it on. I do appreciate it. Aloha
Michelle Liew from Singapore on December 05, 2012:
Whoo hoo! A great illustrator you are, TheToyFactory. I enjoyed this and will pass it on for parents to share with the kids too. Thanks for sharing!
Chris Desatoff (author) from USA on November 27, 2012:
If you liked this hub, you may want to try my new one on how to draw a cartoon kitty cat. I'll add a link into the article above, but you can also click below to go check it out.
https://feltmagnet.com/drawing/How-To-Draw-A-Cute-...
Chris Desatoff (author) from USA on November 11, 2012:
=) that IS cool, luv! I hope she has fun with it! I'm gonna do a little kitty cat next, so stay tuned!
luvintkandtj from USA on November 09, 2012:
I showed this to my daughter. She is a budding artist. I can't even draw a circle so I cannot give her any artistic advice. But this was something easy I could do and it made me look relatively cool to my 9 year old
Chris Desatoff (author) from USA on November 09, 2012:
But stick zombies are the BEST =) Well, I'm glad you found it interesting. Thanks for commenting and sharing, Melissa!
Melissa Propp from Minnesota on November 09, 2012:
Well, I can't even draw stick figures...but I saw your cute zombie and this catchy hub title and I knew I had to read it. I'm not going to attempt my own drawing, and believe me--that is a first! Very interesting. Voting up and sharing!
Source: https://feltmagnet.com/drawing/How-To-Draw-A-Cute-Zombie-Step-By-Step
Post a Comment for "Hiw to Draw a Zombie Face on a Kid Easy"